How to set up a Web Disk (WebDAV) account in cPanel
cPanel’s Web Disk lets you connect to your hosting files as if they were a folder on your computer, using WebDAV. The best part is that you can create an extra account limited to a single folder, so you never have to hand out your main cPanel login. Here’s how to set it up on your shared hosting account.
Before you start
- Have your cPanel access ready.
- Decide which folder you want to share (for example, a documents folder inside
public_htmlor outside of it). - Decide whether the person needs to upload and delete files or only download them.
- If your domain already has an SSL certificate, you’ll use the secure connection with no extra steps.
Create the account
- Log in to cPanel and open Web Disk in the Files section.
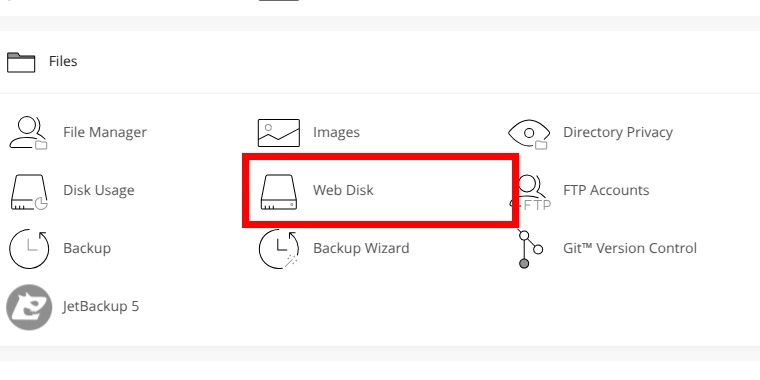
- You’ll see the Main Web Disk Account section. Don’t share that account; use Create an Additional Web Disk Account instead.
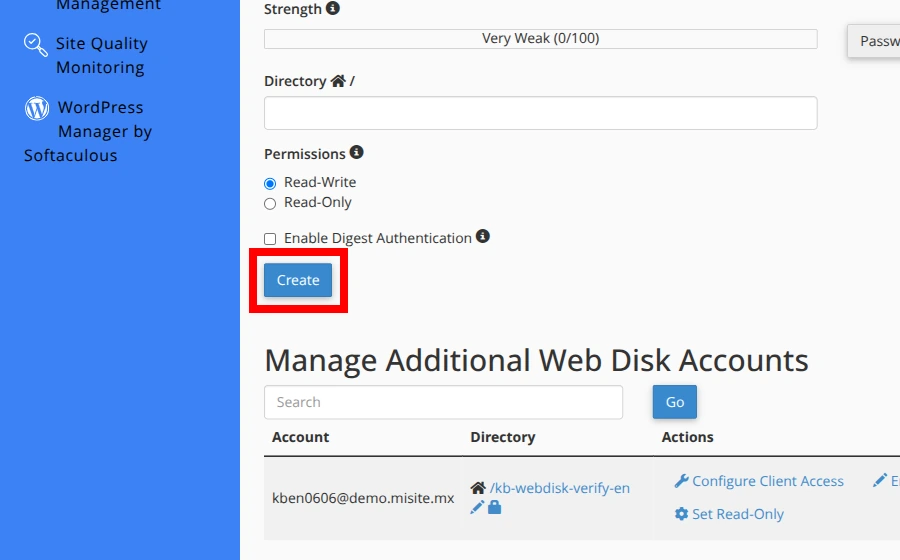
- In the form, type a Username.
- Type a strong password in Password and Password (Again), or use the Password Generator.
- Confirm the Domain cPanel shows next to the username.
Choose permissions and directory
- Under Directory, set the exact folder the account can reach. If you point it to a subfolder, the account only sees that level and below.
- Under Permissions, pick an option:
- Read-Write: the person can upload, edit, and delete files inside the assigned folder.
- Read-Only: the person can only list, open, and download files.
- Leave Enable Digest Authentication off if your domain already has a signed SSL certificate. It’s only needed for certain Windows cases without SSL.
- Click Create. cPanel should show a confirmation such as “You successfully created the Web Disk account.”
Configure client access
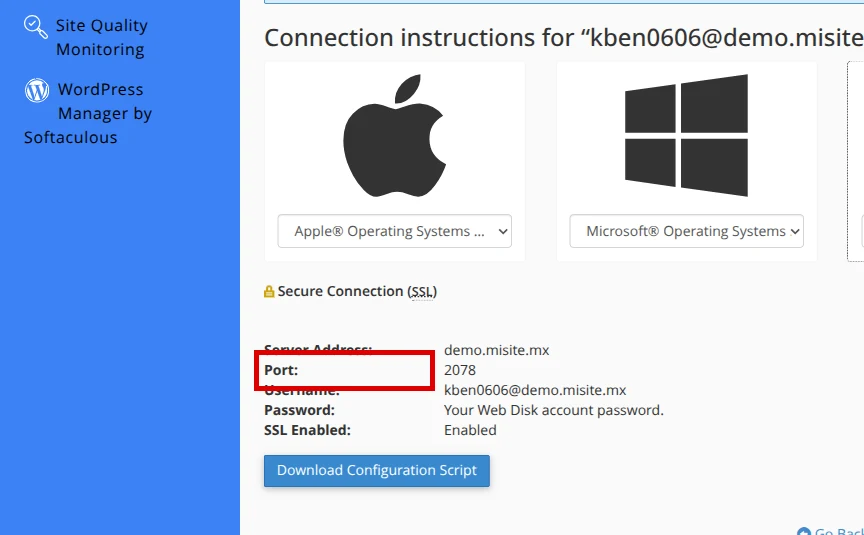
- From the confirmation page or the account list, open Configure Client Access.
- If cPanel detects your operating system, click the detected notice; you can also choose an option from the operating system menus.
- Note Server Address, Username, and Port. For the secure connection, the port should be 2078 and SSL Enabled should show as enabled.
- Pass these details to the person who will use the account, along with the password you set.
Verify the connection
- Connect with the additional account’s username and password using port 2078.
- Confirm that only the folder you assigned shows up, not the rest of the hosting.
- If the account is Read-Write, upload a test file and then delete it.
- If it’s Read-Only, check that you can download but not upload.
Common errors
- It won’t connect or keeps asking for the password: make sure you’re using the secure port 2078, the correct server address, and the current password; if it still fails, use Change Password in the account list and try again.
- It shows more folders than intended: the account points to a folder that’s too high. Remove it with Delete and recreate it pointing to the correct subfolder.
- It can’t upload files: the account was set to Read-Only. Create a new one with Read-Write for the folder it needs.
Recommended reading
Still need help?
If this guide didn’t solve your issue, our team can help you via ticket.