How to create your first course in Moodle
After installing Moodle with Softaculous on your NubeHost hosting (for example under a subfolder such as /moodle/), the natural next step is to create your first course. In this guide you’ll learn how to create a course from the Moodle administration interface, set its name, category, visibility and dates, and leave it ready to add content. These instructions are verified in Moodle 5.2.
Before you start
Check the following before creating the course:
- Moodle is already installed and running on your domain or subfolder (for example
https://yourdomain.com/moodle/). - You can log in with an administrator account.
- You know the name and topic of the course you want to create.
Don’t upload heavy files (videos, large SCORM packages) yet, until you understand your storage quota and the PHP upload limit on your plan. You can adjust the upload limit later if your plan allows it.
Steps
Log in to Moodle with your administrator account.
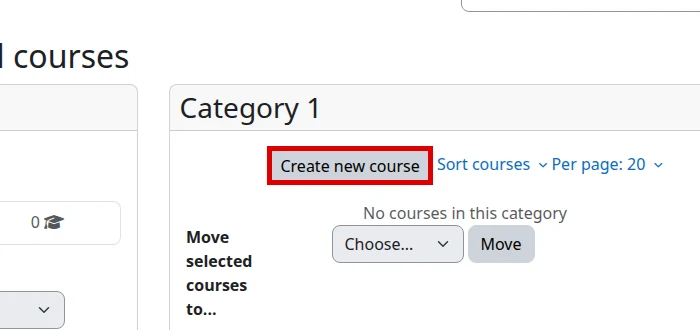
Go to Site administration → Courses → Manage courses and categories. In the category where you want to create the course, click Create new course. Moodle will open the Add a new course form.
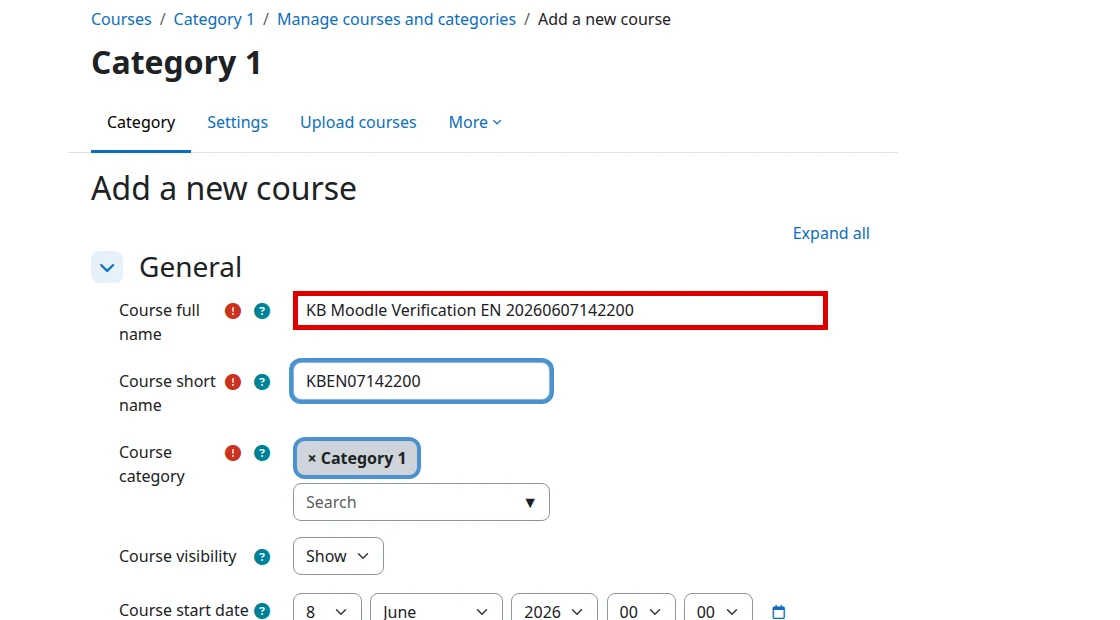
Fill in the Course full name: this is the name visible to students (for example, Introduction to Programming).
Fill in the Course short name: a brief, unique identifier (for example, PROG101).
In Course category, confirm the existing category or select another one. You can create categories later to organize your courses.
In Course visibility, select Show to make it visible, or Hide if you want to prepare it before publishing.
If needed, set the Course start date and Course end date. If they don’t apply, you can keep the default values.
In Course format, review the Format field. In Moodle 5.2 the default format may appear as Custom sections; if your installation shows other available formats, choose the one that best fits the course structure.
Review the remaining options (you can leave them as is) and click Save and display.
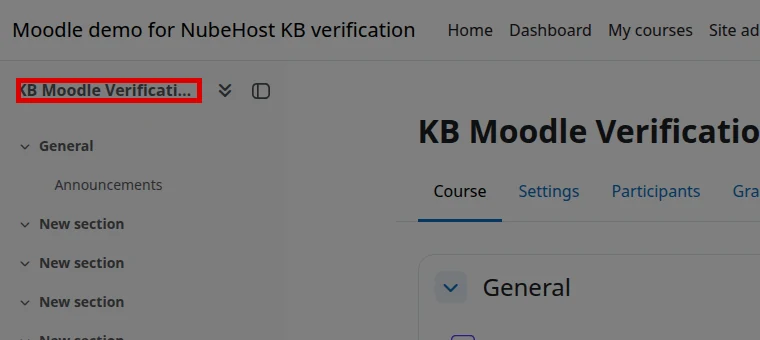
Moodle will open the newly created course, where you can enrol users and add activities or resources.
These screenshots were captured in the English Moodle 5.2 demo to confirm the course creation flow:
Final verification
Confirm the course was created correctly:
- The course appears under Site administration → Courses → Manage courses and categories, within its category.
- When you open the course, you see its full name and the structure of the chosen format.
- If you left it as Show, it appears for users with permission; if you left it as Hide, only administrators and teachers can see it.
- The Course short name is unique and doesn’t trigger a duplicate error.
Common errors
- Duplicate short name: Moodle won’t allow two courses with the same short name. Use a unique identifier.
- Course doesn’t appear for students: check that Course visibility is set to Show and that users are enrolled.
- You can’t find the create course option: make sure you’re logged in as an administrator; roles without permission won’t see Create new course.
- Save fails due to large files: if later you upload resources and it fails, review your plan’s upload limit before continuing.
Recommended reading
Still need help?
If this guide didn’t solve your issue, our team can help you via ticket.